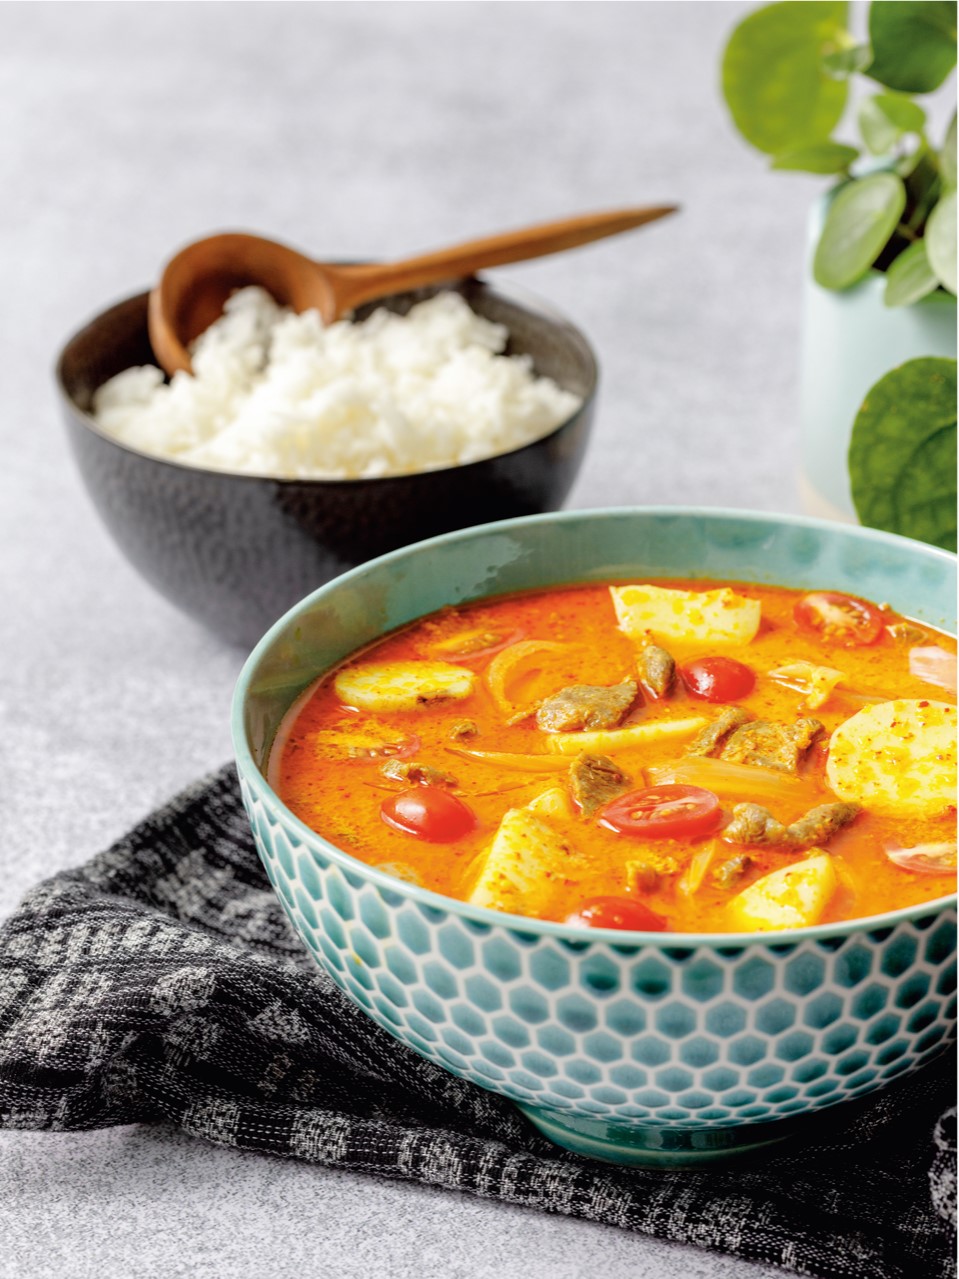
Quick Yellow Curry with Beef
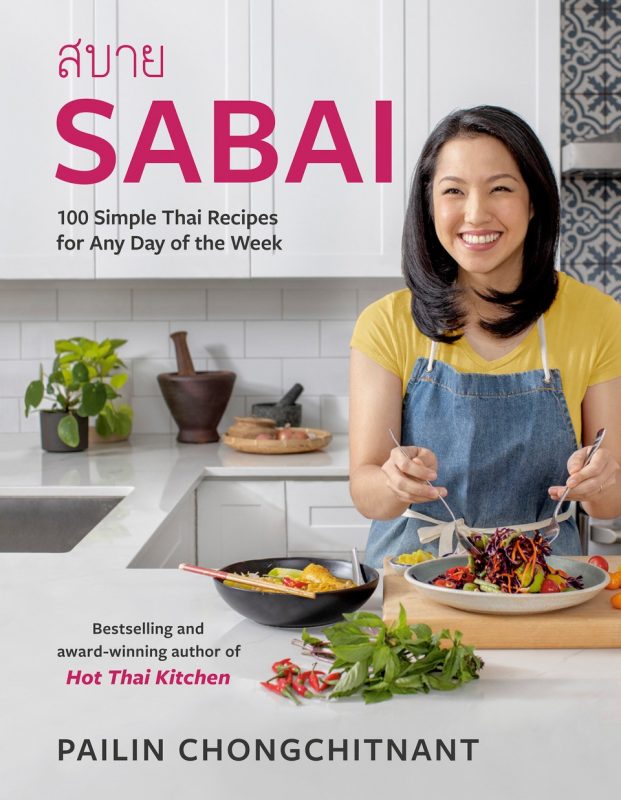
Excerpted from Sabai by Pailin Chongchitnant. Copyright © 2023 Pailin Chongchitnant. Photographs by Janis Nicolay. Published by Appetite by Random House®, a division of Penguin Random House Canada Limited. Reproduced by arrangement with the Publisher. All rights reserved.
By Pailin Chongchitnant
For years I thought of beef curry as a dish that required simmering chunks of stew beef for hours until tender. But for a weeknight, I wondered if there was a way to do it quickly and without a pressure cooker. Then I remembered my days working at a quick-service Thai restaurant, where we churned out pots of fork-tender beef curry in 45 minutes. The secret was using thinly sliced beef and choosing a flavorful but not-too-tough cut so it would not take a long time to tenderize. The restaurant used flank, which was great but a little lean for my liking. I found chuck top blade to be the perfect choice in terms of flavor and fat content, and it only takes about 20 minutes of simmering to become fork-tender.
SERVES4
COOKING TIME: 45 minutes
INGREDIENTS
- 1½ pounds (675 g) chuck top blade steak (see note)
- 1 teaspoon (5 ml) table salt
- 5 to 6 tablespoons (75 to 90 ml) yellow curry paste, store-bought or homemade (see below), divided
- 2 cups (500 ml) coconut milk, divided
- 1½ tablespoons (18 g) finely chopped palm sugar, packed
- 1 to 2 tablespoons (15 to 30 ml) fish sauce 1 tablespoon (15 ml) tamarind paste, store-bought or homemade (see below) (see note)
- 10.5 ounces (300 g) waxy potatoes, such as new or red-skinned potatoes, cut into 1½-inch chunks
- ½ medium (120 g) yellow onion, julienned
- ¾ cup (100 g) halved cherry tomatoes Jasmine rice, for serving
Do-ahead: The whole curry can be made up to 3 days in advance and reheated. If reheating,be sure to not overcook the potatoes—or add them when serving.
Notes: If you can’t find chuck top blade, you can choose other cuts of beef that are flavorful but not too tough. Most inexpensive steaks sold for marinating and grilling fit this bill, and if possible,choose one that is not too lean. If you have time to cook, you can choose any stewing beef and increase the cooking time accordingly.
If you don’t have tamarind paste, no need to buy or make it just for this recipe. We just need a little bit of acid to brighten up the sauce, so a few dashes of Worcestershire sauce or a squeeze of lime at the end will also do.
METHOD
Slice the steak into 1/8-inch(3mm) pieces, removing any silver skin on the exterior (the little strip of connective tissue running through the middle of the steak is fine to leave).
Place the beef in a medium pot and add just enough water to sub-merge it. Add the salt and 1 tablespoon (15 ml) curry paste and stir to mix; bring to a simmer over high heat. Turn the heat down to low and simmer for 20 to 25 minutes, until fork-tender. The timing will vary if you use a different cut of meat. Skim off any scum that floats to the top
While the beef cooks, make the curry sauce. In a medium pot, bring ¾ cup (185 ml) coconut milk to a boil over medium-high heat, then add the remaining curry paste and stir to mix well. Turn the heat down to medium and stir frequently until the mixture is very thick and the coconut oil separates from the paste, about 5 minutes (the oil may not separate depending on the coconut milk you’re using; this is okay).
Add the remaining coconut milk, sugar, 1 tablespoon (15 ml) fish sauce, and the tamarind paste to the curry. Stir to mix, then bring to a boil over medium-high heat.
Add the potatoes and onions, and simmer for 5 minutes, then remove from the heat while you wait for the beef to be done; the potatoes should not be fully cooked at this point.
Once the beef is tender, use a slotted spoon to transfer only the beef into the curry. Then add only as much of the beef cooking liquid as needed to keep everything barely submerged. Taste the sauce and adjust the seasoning with more fish sauce, tamarind, or sugar as needed.
Turn the heat to medium and simmer the curryfor another 5 to 10 minutes, until the potatoes are fully cooked.
Stir in the tomatoes, turn off the heat, and allow the tomatoes to soften in the residual heat for 1 to 2 minutes. Serve with jasmine rice.
Choosing Dried Chilies
Most Thai curry pastes use dried red chilies as the base, the source of flavor and color. The good news is that you don’t have to use Thai chilies to make an authentic-tasting curry paste, as most dried chilies will give you similar flavors. The big variable here is heat.
Mild dried red chilies:You want the bulk of your chilies to be on the milder side so that you can add more color and flavor without the paste being overwhelmingly spicy. You can tell how spicy chilies are based on their size: the larger, the milder. In Thailand, spur chilies, or prikcheefa, are typically used, but guajillo and puya peppers also work beautifully; they can be found at stores that sell Latin American ingredients. I have also have had great results with gochugaru, Korean dried pepper flakes.
If you can only find smaller, spicier chilies, remove all the seeds and the white pith to reduce the heat.
Spicy dried red chilies: If you want some real heat, add small chilies. You can add as many as you want, so long as your mouth can handle it, or none at all. Dried Thai chilies, chiles de árbol, or the generic dried chilies at Chinese markets are among those that will work.
Wash Those Dried Chilies!
It might seem strange to wash a dried product, but it is important because some brands can be quite dusty, and you can even feel this dustiness with your hands. I wash the whole bag of chilies when I get them home so that I don’t need to worry about it every time I use them.
Before you wash, inspect the chilies and discard any that are moldy. This isn’t that common, but it’s always good to check. Mold on dried chilies will look like grayish- green dust.
To wash them, fill a large bowl with plenty of cold water, then put the chilies in the water and quickly swish them around for just a few seconds; do not let them linger in the water or they’ll absorb it.
Drain well and spread them out on a towel–lined baking sheet, and use a kitchen towel to dry the tops as much as you can. Let them dry at least overnight, preferably with a fan to help them dry faster. Once they are dried completely, pack them up for storage. If you’ve got lots of sunshine where you live, you can dry them out in the sun for the day (as long as there are no birds around that might come for a snack!). It’s important that they are completely dried before packaging, so feel them for any soft, moist spots, to be sure.
Homemade Tamarind Paste
MAKES ABOUT 2 CUPS (500ML)
COOKING TIME: 20 minutes plus 20 minutes soaking
INGREDIENTS
- ½ pound (225 g) seedless tamarind pulp
- (see note)
- 2 cups (500 ml) hot water
Note: Buy tamarind pulp that comes in a rectangular block, and it should be a product of Thailand. Do not use tamarind pulp from whole pods, as those are sweet tamarind meant for eating, not cooking.
METHOD
Use your hands to pull apart the tamarind block into small chunks and place them in a large, heatproof mixing bowl.
Pour the hot water over the tamarind and let it sit until it’s cool enough for you to handle, at least 20 minutes. You can let it sit for as long as you need at this point—the longer it sits, the easier the next step will be.
Use your hand, preferably gloved if you don’t want tamarind stuck in your nails, to squeeze and scrunch the pulp to loosen it from the fibers. You should end up with something that has the consistency of a smoothie.
Once you can feel that most of the pulp has been released from the fibers, strain the tamarind mixture into a pot through a sieve, but avoid a fine-mesh sieve, as the paste will be thick (Asian noodle strainers work great for this). Push as much of the liquid through as possible, and scrape the bottom of the sieve occasionally.
Gradually pour about ½ cup(125ml) room temperature water over the remaining fibers in the sieve while using your hand to mix it all around. This will rinse off any last little bit of tamarind still stuck in the fibers.
You can use the tamarind paste right away for cooking, but for storage, cook it over medium-high heat until it boils, stirring constantly, because it is quite thick and can bubble and jump at you if you don’t stir. Allow it to bubble for 4 to 5 minutes to ensure that it is thoroughly heated through before turning off the heat.
Transfer the hot tamarind paste to clean 1-cup(250ml) mason jars.
I like using the smaller ones so each jar will not be open for as long. Close the lids while the paste is still hot and let cool at room temperature before moving to the fridge for storage. You can also freeze the paste in ice cube trays and then store the cubes in freezer bags.
Yellow Curry Paste
MAKES ABOUT 2/3 CUP (160 ML), FOR TWO BATCHES OF 4-SERVING CURRY
- 0.7 ounce (20 g) mild dried red chilies, cut in ½-inch (1.2 cm) chunks (see p. 251)
- 1 tablespoon (15 ml) coriander seeds, toasted 1½ teaspoons (7 ml) cumin seeds, toasted
- ½ teaspoon (2 ml) white peppercorns 1 teaspoon (5 ml) table salt
- 1 stalk lemongrass, bottom half only, finely sliced
- 2 tablespoons (15 g) chopped ginger
- 2 tablespoons (15 g) chopped galangal
- 1 tablespoon (8 g) chopped turmeric, or
- ½ teaspoon (2 ml) ground turmeric
- 6 cloves (30 g) garlic, chopped
- ½ cup (70 g) chopped shallots
- 1 tablespoon (15 ml) curry powder
- 2 teaspoons (10 ml) fermented shrimp paste
Using a coffee grinder, grind the dried chilies,coriander seeds, cumin seeds, peppercorns, and salt into a fine powder.
If using a heavy-duty mortar and pestle, add the lemongrass, ginger, galangal, and fresh turmeric, and pound into a fine paste. Add the garlic and shallots, and pound into a fine paste. Add the ground chili mixture and pound until well combined. Add the curry powder, ground turmeric, and shrimp paste; pound to mix.
If using an immersion blender, place the lemongrass, ginger, galangal, and turmeric in a narrow container, such as a glass measuring cup. Then top it off with the garlic, shallots, and shrimp paste (it is easier to blend with the moister ingredients on top). Use the immersion blender to blend everything until fine. You will need to lift and reposition the blender several times, stopping to scrape the bottom and bringing it to the top halfway through. Once the mixture is fine, add the ground chili mixture, curry powder, and ground turmeric, and blend to mix.
Use right away, store in the fridge for up to 3 days,or divide into two portions and freeze for up to a few months.

PAILIN CHONGCHITNANT was born and raised in Thailand. After attending the University of British Columbia, she made her way to Le Cordon Bleu culinary school in San Francisco, and began cooking for both Western and Thai restaurants. She is the creator and host of Hot Thai Kitchen, a popular cooking show on YouTube, which takes an educational approach to Thai cuisine. Visit her at hot-thai-kitchen.com.